Creating Your Own VPN with OpenVPN
Numerous VPN options are available on the market, making the selection process challenging. One key advantage of using a VPN is the capability to alter your public IP address. By connecting to a VPN, you can access websites using an IP address different from the one assigned by your Internet Service Provider. This proves beneficial for accessing region-locked content or evading targeted advertisements. Nevertheless, VPN IP addresses are public, and websites have the ability to block or deprioritize traffic from recognized VPN IPs. Moreover, when employing a paid VPN provider, you are relying on them to safeguard and maintain the privacy of your browsing data. Rather than opting for a paid VPN solution, I will demonstrate how to establish your private VPN server that does not retain logs of your browsing history.
For this demonstration I will be using the Openvpn script provided by the GitHub user angristan. This GitHub script installs OpenVPN version 2.6.8 and provides an interactive menu to simplify the configuration of this VPN. Always review the contents of scripts downloaded from the internet prior to running them.
Configuration
The following steps were performed in AWS with an EC2 instance in the us-west-1 region. I am using a t3.medium instance type running Ubuntu 22.04. Supported Operating Systems can be found in the Github listed above. If more network bandwidth is required for your use case the following documentation outlines the bandwidth for each AWS Instance Type. Keep in mind that T series Instance Types run on the Burst Credit Model, which could affect the performance of this VPN down the line.
Note: Burst credits apply to both CPU Utilization AND Network Performance.
To streamline the installation process I added the commands to install the OpenVPN GitHub script to my instance’s userdata during its creation.
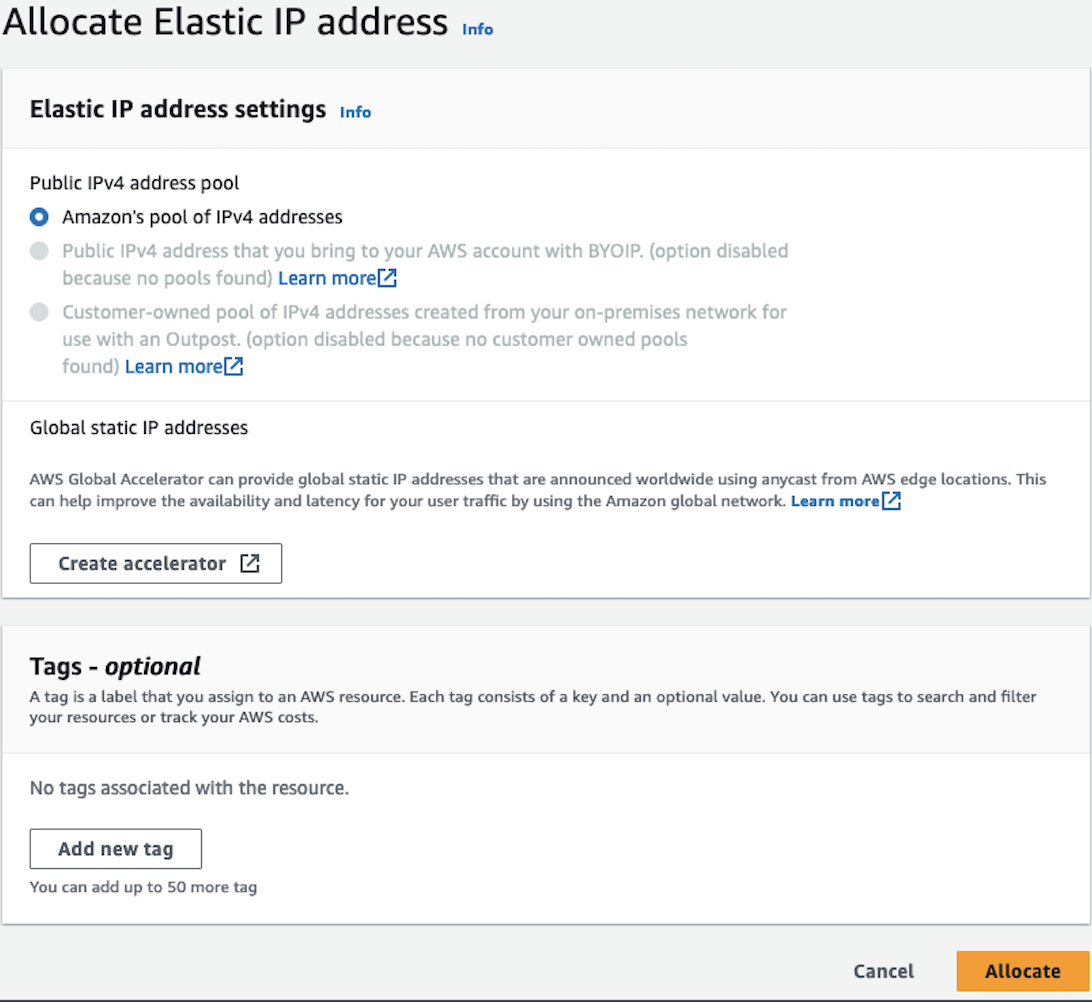
While my instance was being created I allocated an Elastic IP address to associate with our instance. This will ensure that when our instance is stopped or rebooted the same IP address will persist. In the EC2 console select ‘Elastic IPs’ under the Network & Security tab. Select the Orange ‘Allocate’ button in the top right of the console
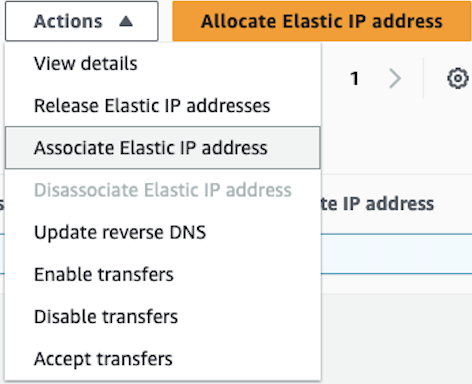
Once the Elastic IP is allocated we need to associate it with the Private IP of our Instances’ ENI. Select the Actions tab in the top right, then choose ‘Associate Elastic IP address’
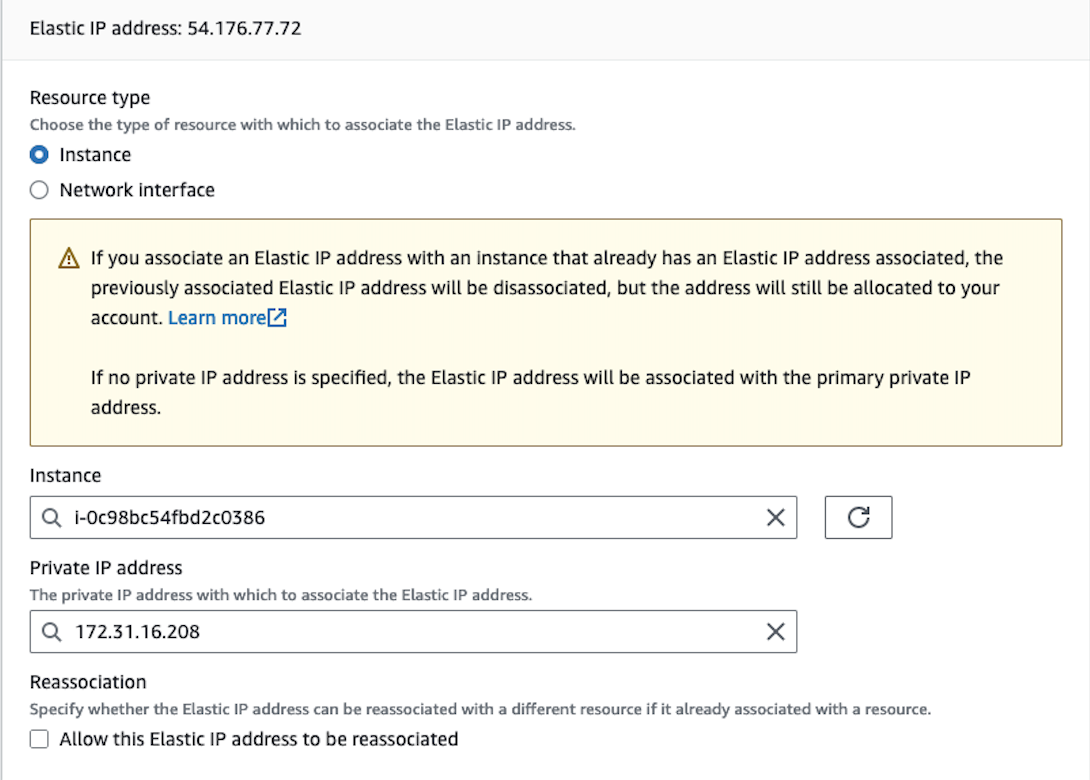
After selecting ‘Associate Elastic IP Address’, select the instance that was created and its corresponding Private IP
Once these steps are complete connect to the new instance via SSH to continue our configuration. The Openvpn installation script will be installed in the / directory, so we will move to that directory with the following command
cd /
We will then move the openvpn-install.sh script to the home folder of our Ubuntu user.
Run this command as sudo or permission denied errors will occur
Change back to the /home/ubuntu directory
cd /home/ubuntu
Script Options
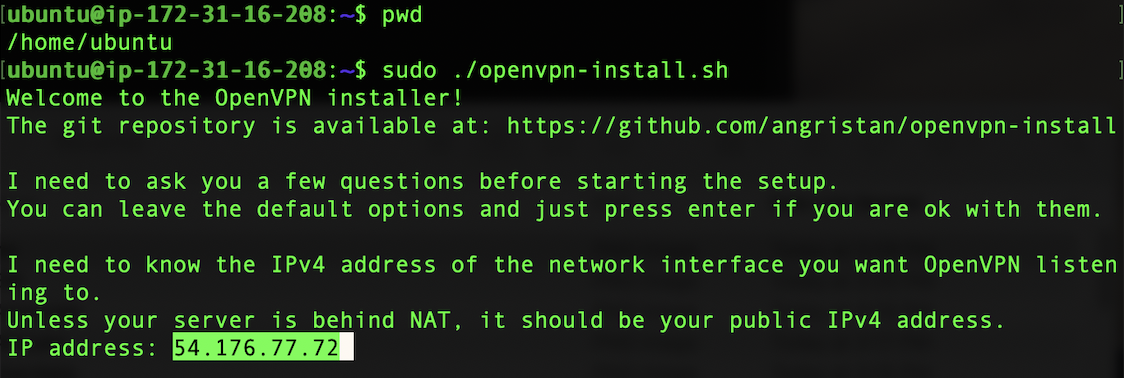
Run the openvpn-install.sh script to begin the VPN configuration. There are various different configuration options for the script, below are the options I chose for my installation
sudo ./openvpn-install.sh
Set the public IP address to match the Elastic IP
Leave the IPv6 option as no
Any port can be used to run OpenVPN, but I left it as the default of 1194
Leave the protocol as UDP
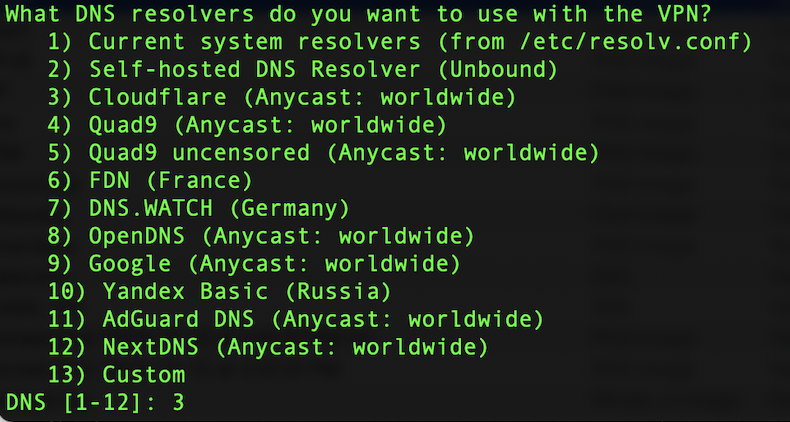
There are various options for the VPN’s DNS servers, I selected Cloudflare’s which is option 3
Leave compression as no
Leave the encryption settings as no too
After completing these steps, a final message will come up prior to generating the VPN Client. Any key can be selected to continue. After the client is generated, create a name for the client
As a final option, you can set a password to access the client. I recommend setting a password if this VPN client is for personal use so others cannot access it. However, for the purpose of this demonstration I used a passwordless client.
Congratulations, you have now created your own VPN Client! If you run the ls command in the folder where the script was run, you will see a Client matching the name that was entered
Using the scp command, I copied the client to my machine from the EC2 instance. The following article gives an in-depth guide on how to upload and download data to and from EC2 instances with the scp command.
In order to properly run the VPN client, OpenVPN Connect will need to be installed on the client machine. The directions for each Operating System can be found here. I already had OpenVPN Connect installed on my Mac and Windows machine. I will first demonstrate how the VPN performs on my Mac.
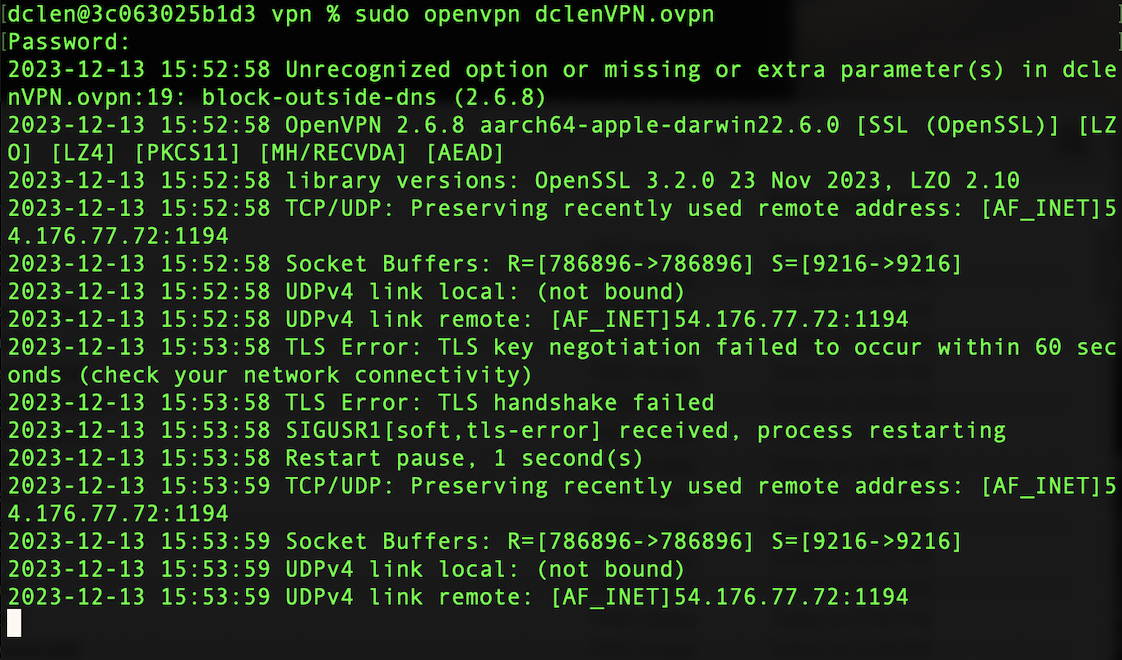
Run the vpn client with the following command
Sudo openvpn dclenVPN.ovpn
Unfortunately our VPN connection times out.
Fixing the Network Configuration
During our configuration, we selected a port to run OpenVPN on (port 1194 in my case). To fix these connection issues, we need to allow inbound UDP IPv4 traffic to the VPN’s port in our instance’s security group
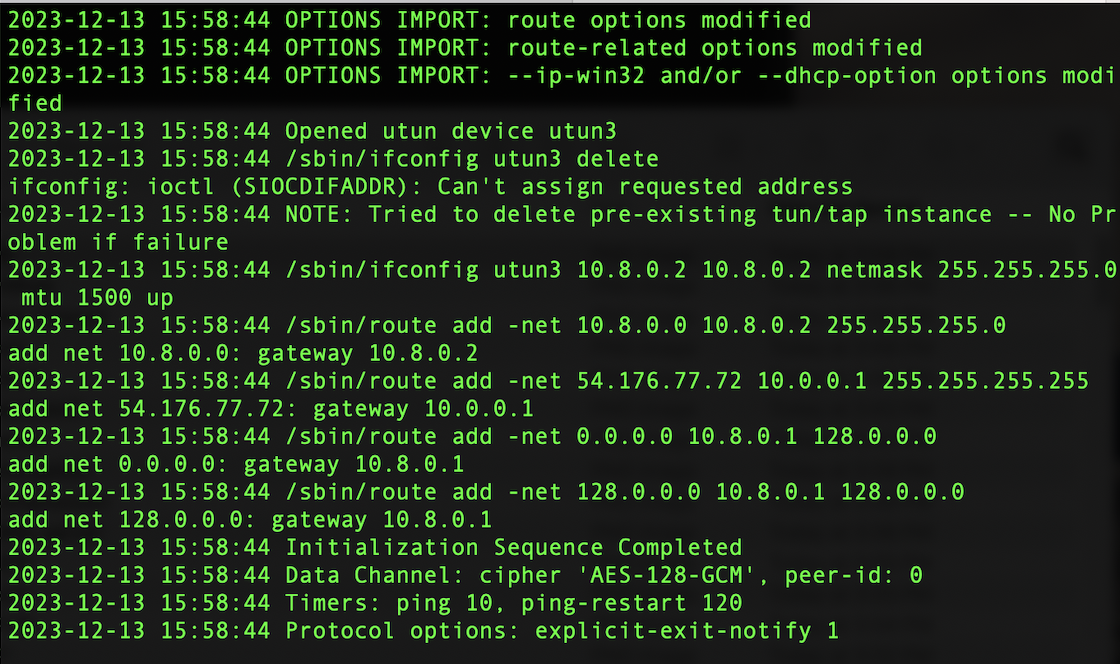
Now let’s run the client again and see if we can properly connect
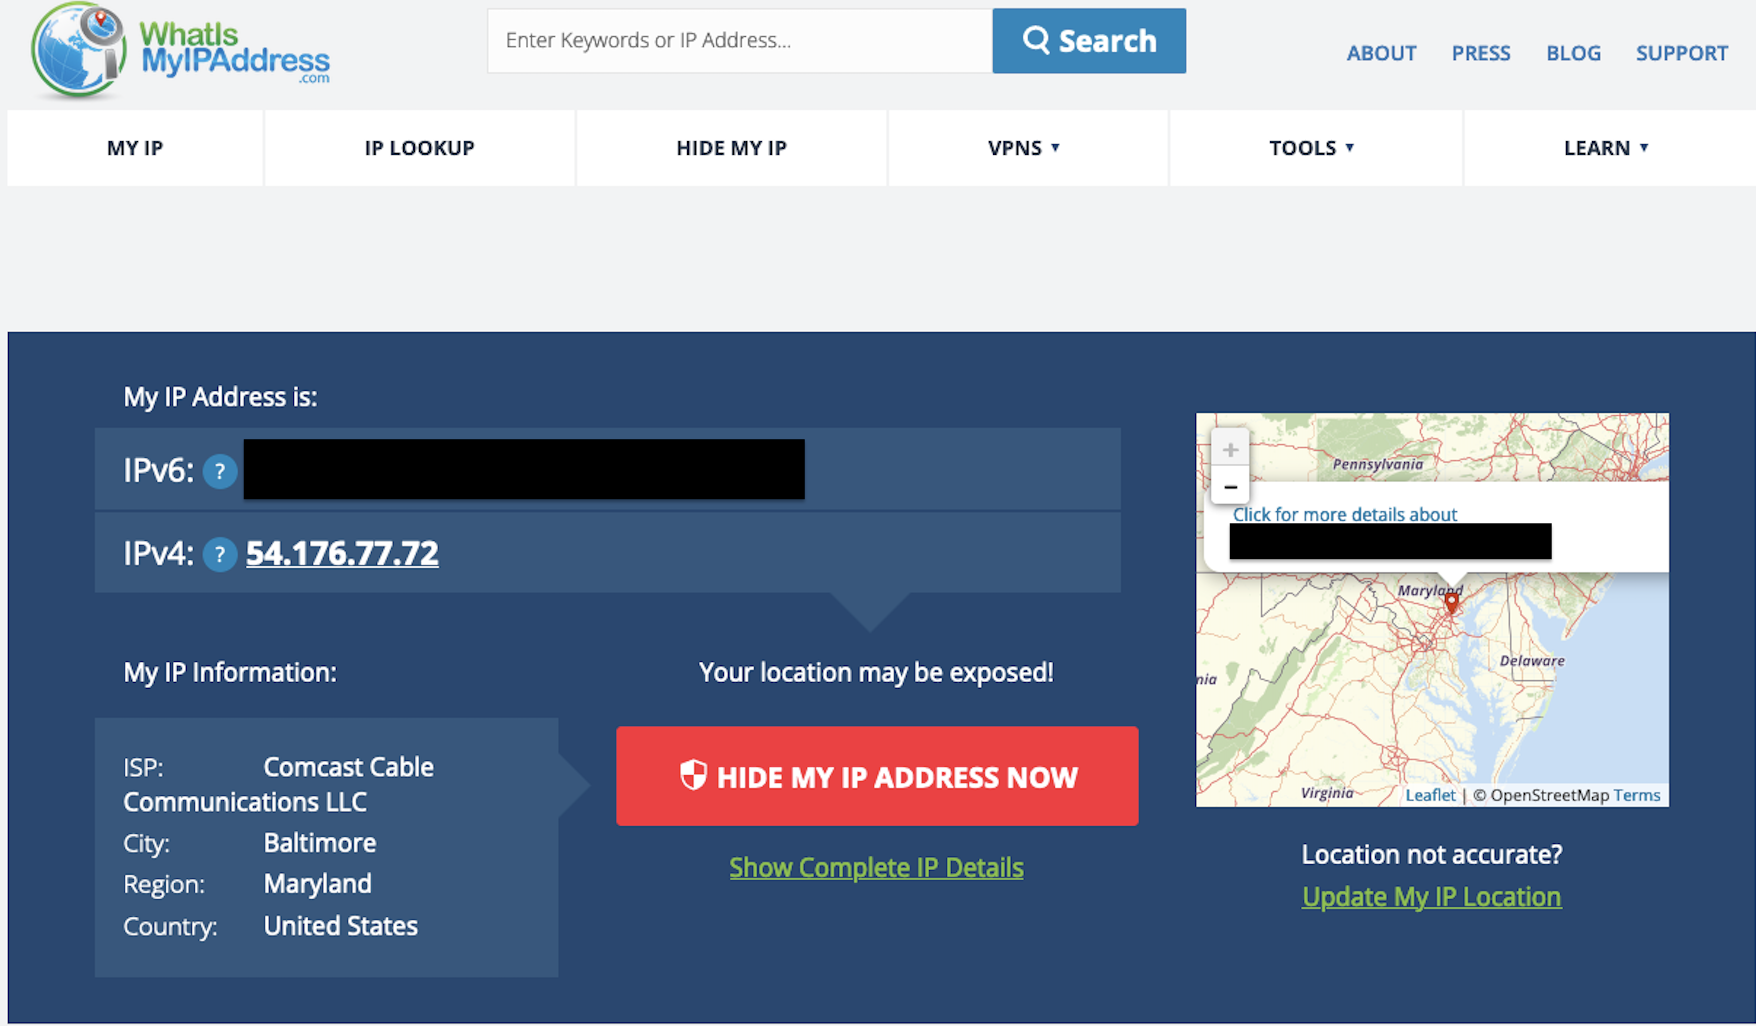
We will now see more output when running the openvpn command on our client. Let’s check what our public IPv4 address is on whatismyipaddress.com
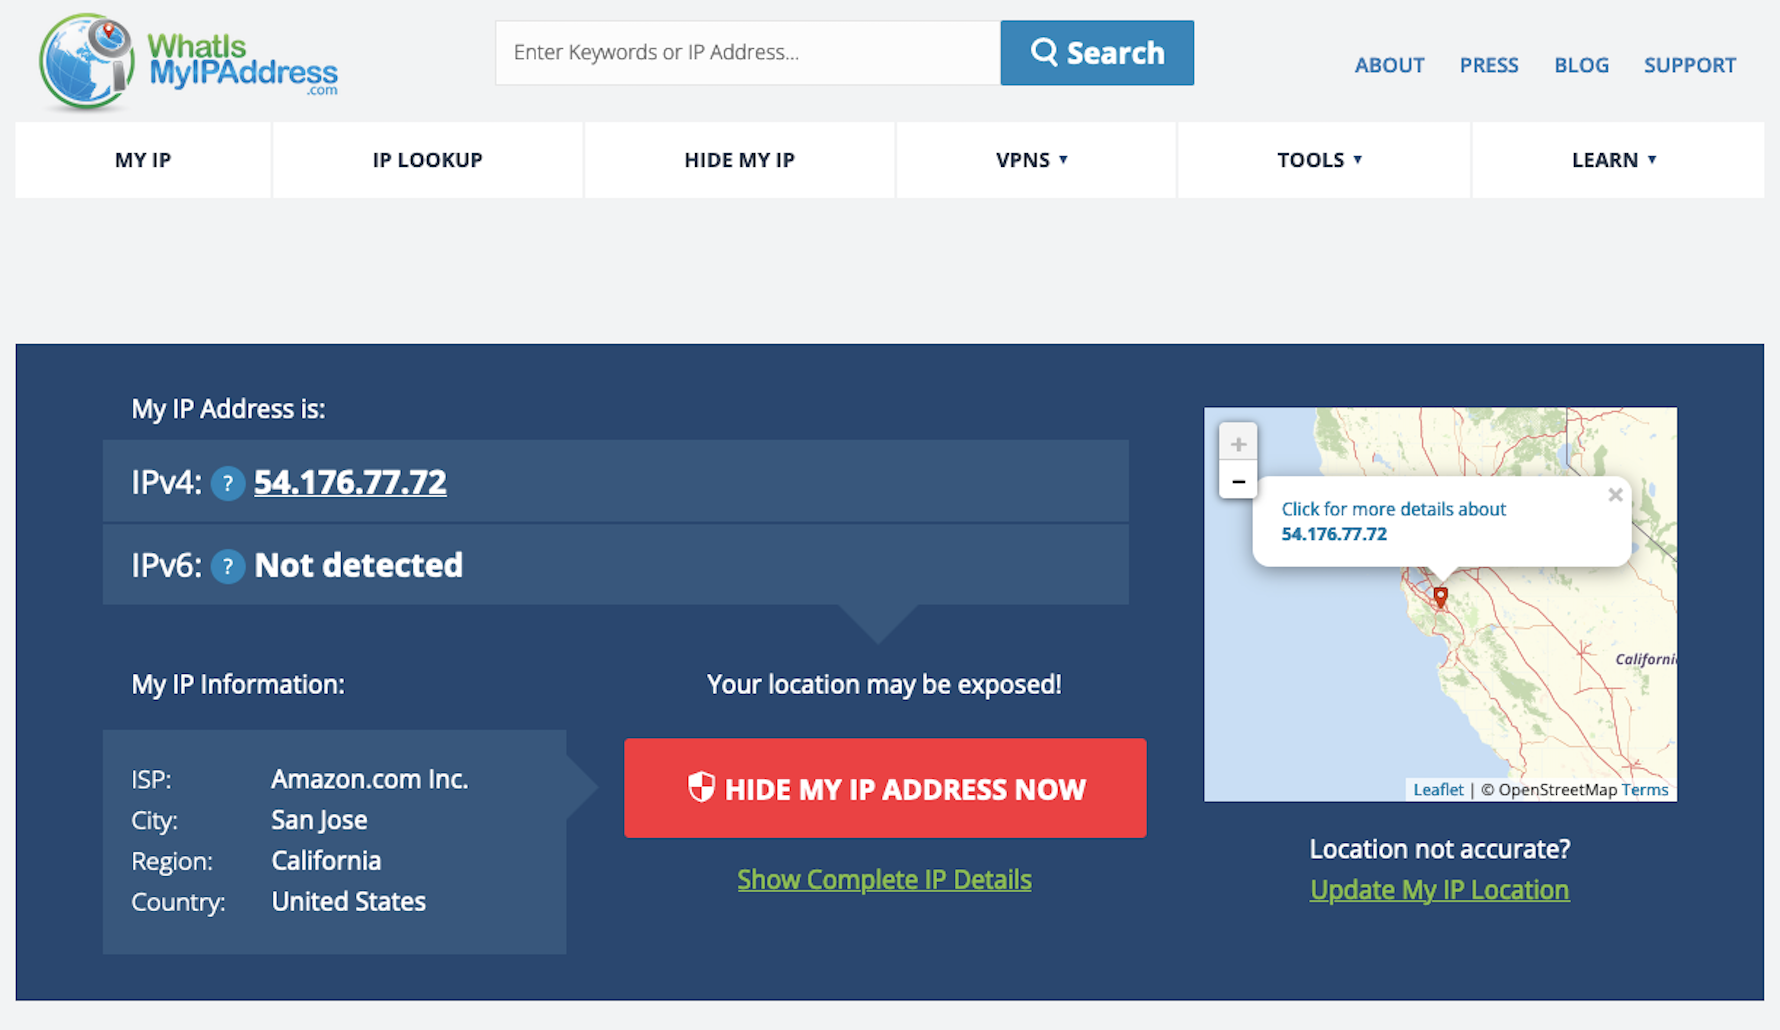
We see our public IPv4 address now matches the Elastic IP address of our EC2 instance in us-west-1! However, our IPv6 address is still showing our true location. IPv6 leaks are a common way to deanonymize VPN users. While we did not enable IPv6 traffic during our setup, additional configuration is required in the /etc/openvpn/server.conf file of our instance to block IPv6 traffic. To remediate the IPv6 leaks, I implemented the steps outlined in the following article.
Remove IPv6 Leaks
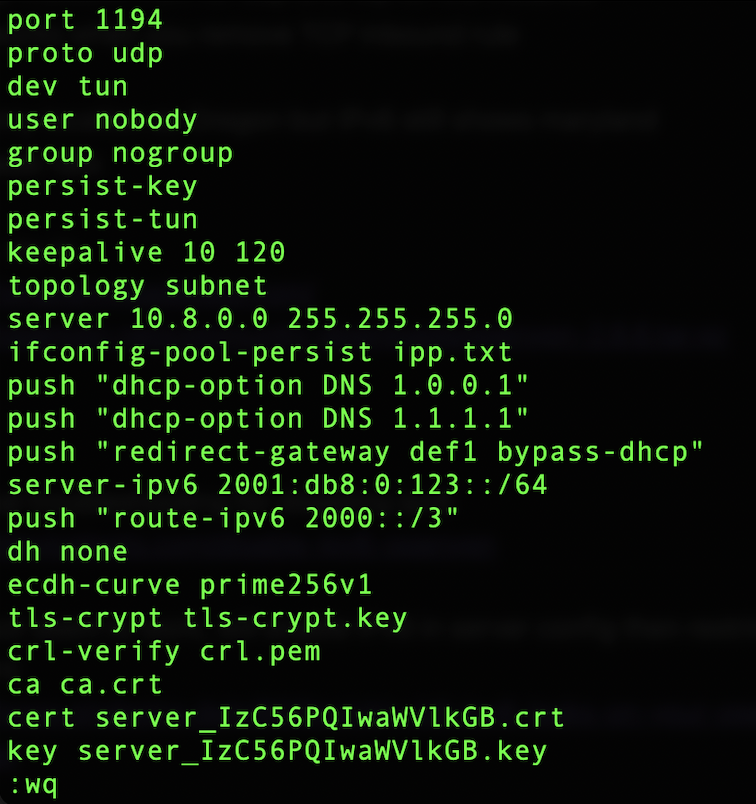
I began by adding the following lines to the /etc/openvpn/server.conf file
server-ipv6 2001:db8:0:123::/64
push "route-ipv6 2000::/3"
Then I restarted then Openvpn server with the following command
sudo systemctl restart openvpn
Next I added the /etc/sysctl.conf file and added the following line
net.ipv6.conf.all.forwarding=0
To apply the changes made in the /etc/sysctl.conf file run the following command
sysctl --system
Finally I added a firewall rule to block all IPv6 connections from our Openvpn client
Now if we check https://whatismyipaddress.com/ again we will see that our IPv6 address no longer appears and our location is listed as California!
DNS Leaks
It is important to note that IPv6 leaks are not the only way to deanonymize VPN usage. Another potential pitfall is DNS leaks.
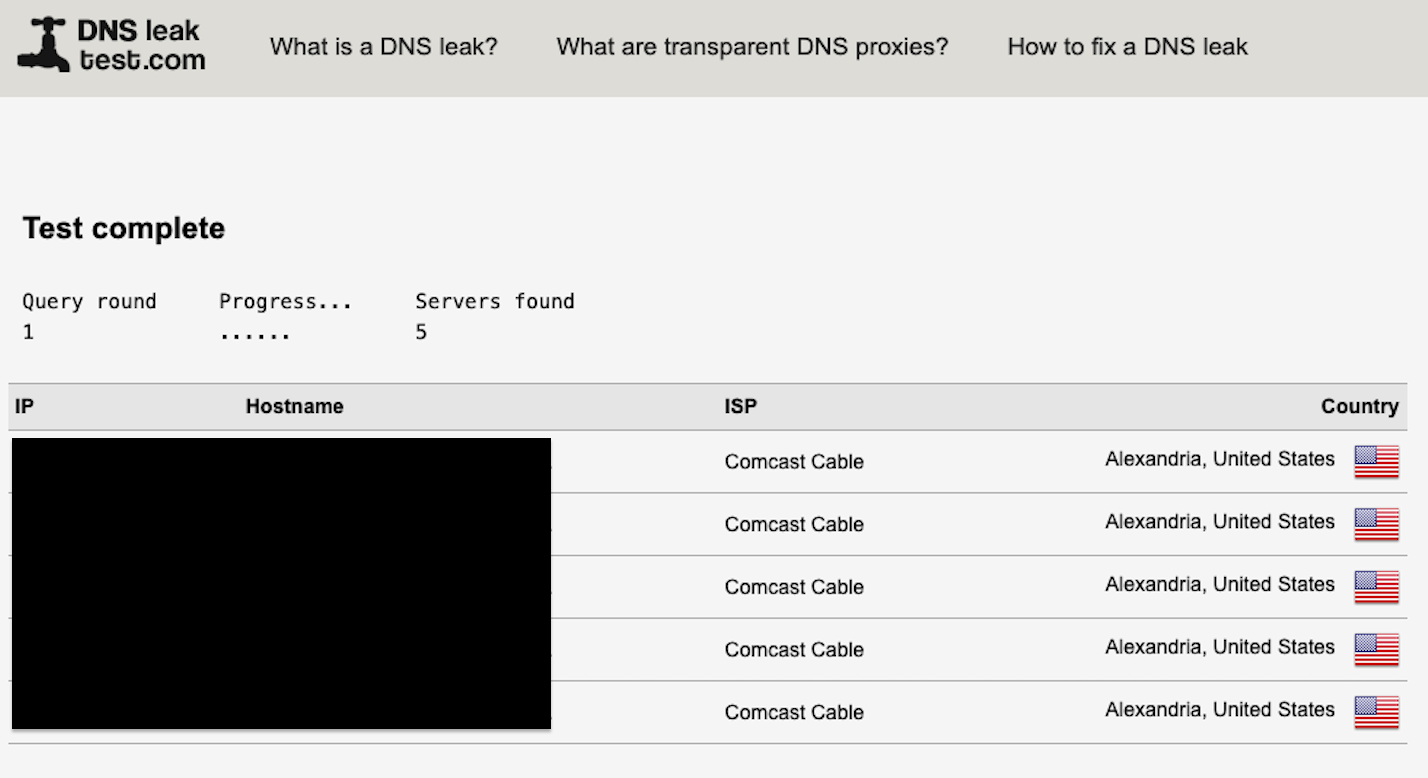
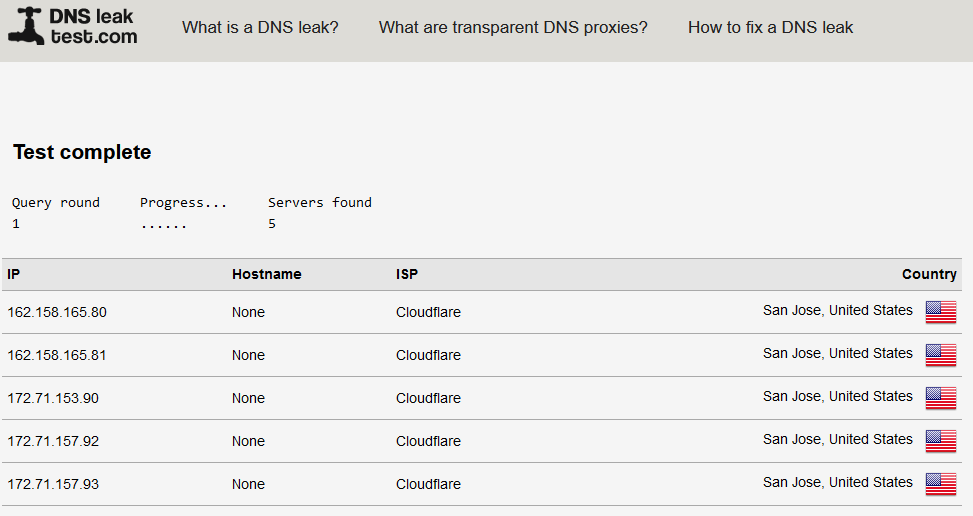
Our current configuration will result in DNS leaks for Mac and Linux computers as shown here
However, when connecting to our VPN from Windows, there are no DNS leaks
If you are using Mac or Linux, additional DNS adjustments will be required on the client end to remediate DNS leaks. The following article provides potential solutions that could be implemented.
Removing Logs
As a final note, many VPN’s claim to be RAM based and do not store any data that could identify the users that are connecting to them. To achieve this on our OpenVPN server, we can disbale logs in the /etc/openvpn/server.conf file. Set the verb option to 0 as shown in the image below
Then, restart the Openvpn server with the following command
sudo systemctl restart openvpn
Now no logs will persist in the /var/log/openvpn folder when you connect to the VPN.
Conclusion
Establishing your own private VPN has numerous advantages, primarily in enhancing security and flexibility. By constructing a personalized VPN infrastructure, you gain the ability to implement stringent security measures and encryption protocols, ensuring the safeguarding of sensitive data from potential threats. While this article covered a basic configuration, additional customization of your OpenVPN Server is possible. If you would like to create your own VPN from scratch, Digital Ocean provides a great guide on how to do so here. I hope this article will be useful for anyone looking to spin up their own VPN server in the future!


